以前紹介したAPC製 UPS(無停電電源装置)の記事
Smart-UPS 1000 無停電電源装置 バッテリー交換
あれだけではUPSとしての利用価値が半減以下になってしまいます。
今回は(私が調べたところ)まだ何処も紹介していないですが
VineLinux 4.2で構築したサーバーでPowerChutePlusを使い
停電になったら自動的にシャットダウンさせるように設定してみます。
本来Smart-UPS 1000をPCとつなぐ為には専用のシリアルケーブル(9ピン)を
使用します。
しかし、私はSmart-UPS 1000本体だけしか持っていません^^;
しかも、ごく普通のシリアルケーブルを購入して変換アダプターも探し出した後。。。。
純正品を買ったら5000円程するようです。
『マジですか・・・・・・・』
なんかここまで来たらヤケクソでしょうw
買ったシリアルケーブルは他には使い道無いので気合で自作します。
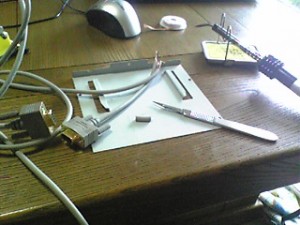
先ず、下記を部屋から持ってきます。
半田小手
ヤニ入り半田
半田吸い取り線
万力みたいな固定する道具
小手拭き
皮むき(今回はメスで代用)
熱収縮管
エポキシパテ
シリアルケーブルの向きを決めます。
オスの方がUPS側、メスの方がPC側
断面を見ると右から順番に
5. 4. 3. 2. 1
9. 8. 7. 6
と言う順番です。
1 DCD 茶
2 RxD 赤
3 TxD 燈
4 DTR 黄
5 GND 緑
6 DSR 青
7 RTS 紫
8 CTS 灰
9 RI 黒
G 剥き出し
ケーブルを好きな所で豪快にちょん切ります。
以下の図はSmart-UPSのシリアルケーブルの自作様より引用
PC側 ( 9 pin メス) ←→ UPS側 ( 9 pin オス)
2 ——– 2
3 ——– 1
5 ——– 9
G ——- G ( シールド )
その他は、すべて NC
NCとは繋がっていないという事を意味します。
つまり、下記のように半田で繋げていきます。
PC側 ( 9 pin メス) ←→ UPS側 ( 9 pin オス)
剥き出し —– 剥き出し
赤 —– 赤
燈 —– 茶
緑 —– 黒
必要なリード線を剥いでいきます。
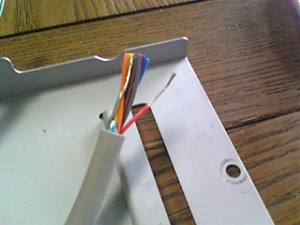
万力で固定し、半田で止めていきます。
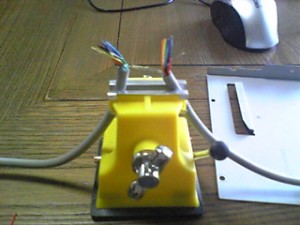
接着したらこまめに熱収縮管で絶縁していきます。
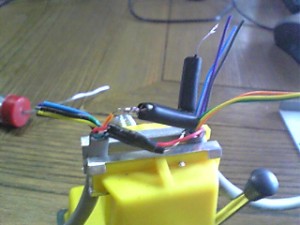
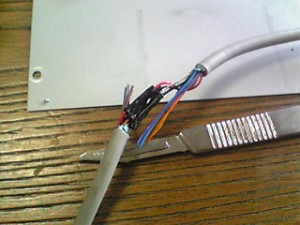
全て終わったらパテでショートや接触不良を防ぐ為に固定します。
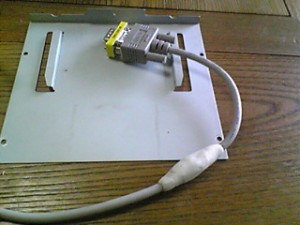
こんな感じです。
つづいてPowerChutePlus for Linuxをダウンロードしていきます。
VineLinux 4.2に最も近い環境であると考えられるRedHat 9用のPowerChutePlus
を利用します。
PowerChutePlus-4.5.3-1.i386.rpm
がベターでしたが、どうもサポートが終了したり
サイトが閉鎖したみたいですので今回は
Download mirrors for PowerChutePlus-4.5.3-1_RedHat.i386.rpm (2.45 MB):
ここからPowerChutePlus-4.5.3-1_RedHat.i386.rpmをダウンロードして来ます。
一応、当サイトでもミラーとして公開します。
PowerChutePlus-4.5.3-1_RedHat.i386
※利用規約等が見当たらなかったのでミラーとしてサーバーにUploadしました。
何か不都合がありましたらお手数をおかけしますが、お知らせください。
普通にインストールしますと
libstdc++-libc6.2-2.so.3 は PowerChutePlus-4.5.3-2.i386 に必要とされています
というようなエラーが出ます。
ですのでlibstdc++-libc6.2-2.so.3をインストールしようとしますが
単体では存在しません。
libstdc++2_10の中にバーチャルパッケージとして含まれているようですので、
インストールします。
[root@localhost root]# apt-get install libstdc++2_10
しかし、以下の様な文が表示されます。
E: 未解決の依存情報です。’apt-get -f install’ を実行してみてください(又は
解決パッケージを明示してください)。
[root@localhost lib]# apt-get -f install
を実行し、もう一度
[root@localhost root]# apt-get install libstdc++2_10
を実行するとインストールできるかと思います。
ディレクトリ/usr/libへ移動します。
[root@localhost lib]# cd /usr/lib
シンボリックを貼ります。
[root@localhost lib]# ln -s libstdc++-libc6.3-2.so.3 libstdc++-libc6.2-2.so.3
rootディレクトリへ移動します。
[root@localhost lib]# cd
インストールを開始します。
何故かこのパッケージは微妙にタイトルのバージョンと内容が異なりますので一応
書いておきますが、中身はPowerChutePlus-4.5.3-2.i386です。
[root@localhost root]# rpm -ivh PowerChutePlus-4.5.3-1_RedHat.i386.rpm
準備中… ########################################### [100%]
1:PowerChutePlus ########################################### [100%]
You must run /usr/lib/powerchute/Config.sh to configure PowerChute plus
こんな感じで問題なくインストール出来るかと思います。
設定を開始します。
[root@localhost root]# /usr/lib/powerchute/Config.sh
———————————————————————–
PowerChute Plus for Linux v4.5.3 Configuration Script
Copyright American Power Conversion 2001
———————————————————————–
1) Matrix-UPS
2) Smart-UPS
3) Back-UPS
4) Back-UPS Pro
5) Symmetra Power Array
6) Smart-UPS DP
Which APC Hardware will PowerChute Plus for UNIX be running with [?] 2
Smart-UPS 1000なので2を選択
—————————————————————————-
The Measure-UPS is a device which is designed to perform environmental
monitoring in conjunction with PowerChute Plus for UNIX
—————————————————————————-
Do you currently have a Measure-UPS attached to the UPS? [y/n] n
Measure-UPSを使っているかと聞かれますのでnを選択
—————————————————————————-
PowerChute Plus for UNIX is able to monitor other hosts. However, in order
to monitor other hosts TCP/IP must be installed. If you do not have
TCP/IP installed, answer ‘n’ to the following question.
—————————————————————————-
Do you currently have TCP/IP Installed? [y/n] y
インターネットに繋がってるかと聞かれますのでyを選択
—————————————————————————-
If you will be using the Motif version of the User Interface on a
monochrome monitor, using the Monochrome Coloring scheme is recommended.
—————————————————————————-
1) Use Default Color scheme
2) Use Monochrome Color scheme
Which color scheme do you wish to use [1]? 1
カラーかときかれますので1を選択
—————————————————————————-
PowerChute Plus for UNIX requires complete control of the serial port. No
processes, including gettys, are allowed to be accessing the port.
Therefore, the serial port you select must NOT be enabled for logins. To
ensure that PowerChute Plus for UNIX has control of the serial port, make
sure that it is not enabled for logins. To disable the port for logins
consult the PowerChute Plus for UNIX manual.
—————————————————————————-
1) /dev/ttyS0
2) /dev/ttyS1
3) Other
Which serial device will be dedicated to PowerChute Plus for UNIX [?] 1
シリアルケーブルを何処に繋げているかと聞かれますので
シリアルポート1なので1を選択
—————————————————————————-
Command files may be executed with root privileges or with the
privileges you assign to the pwrchute account (allowing you to
customize command file execution according to your system
requirements).
—————————————————————————-
Do you want to execute command files as root? [y/n] y
rootでインストールを続けるかと聞かれますのでyを選択
—————————————————————————-
E-mail may be sent with root privileges or with the privileges you
assign to the pwrchute account.
—————————————————————————-
Do you want to send e-mail as root? [y/n] y
root宛てにメールを送信するように指定するかと聞かれますのでyを選択
—————————————————————————-
PRODUCT : PowerChute Plus for UNIX
DEDICATED TTY : /dev/ttyS0
UPS TYPE : Smart-UPS
Measure-UPS INSTALLED : FALSE
INSTALLING AS ROOT : TRUE
TCP/IP Installed : TRUE
RUN COMMAND FILES AS ROOT : TRUE
SEND EMAIL AS ROOT : TRUE
—————————————————————————-
Are the above selections correct? [y/n] y
確認画面が出るので問題なければyを選択
Checking for binary compatibility…
binary compatibility VERIFIED
/dev/ttyS0 verified as a valid tty
The following Port validations for /dev/ttyS0 may take a few moments….
/dev/ttyS0 appears to be a local control port
making backup copy of shutdown files…
modifying shutdown files….
UPS communications on /dev/ttyS0 verified
Done.
—————————————————————————-
Due to the amount of time it can take Unix platforms to shutdown,
it is sometimes necessary to increase the eeprom parameter UpsTurnOffDelay
within the UPS. This is in order to allow sufficient time for the
Operating System to shutdown completely.
—————————————————————————-
* Doing this is recommended for the Linux Operating System *
—————————————————————————-
Do you wish to increment the UpsTurnOffDelay to its next highest
value now? [y/n] y
何か色々出ていますがデフォルトでかまわないのでyを選択します。
UpsTurnOffDelay successfully set at 180.
The PowerChute plus User Interface will prompt you for a password when you attempt
to connect to the upsd daemon running on this machine. This password is the
password of the pwrchute user account.
Adding a pwrchute user account
Please set the password for the pwrchute user account.
Changing password for user pwrchute.
New password:
Retype new password:
パスワードを決める必要があります。
passwd: all authentication tokens updated successfully.
—————————————————————————-
PowerChute Plus for UNIX Installation complete. You will need to reboot
in order to start the application
—————————————————————————-
これでインストール終了です。
気になるので一応自動起動するように設定します。(たぶん必要無いかも)
[root@localhost root] # chkconfig upsd on
[root@localhost root] # chkconfig –list upsd
upsd 0:off 1:off 2:on 3:on 4:on 5:on 6:off
ちなみにUPSの電源を抜き端末(ターミナル)を起動すると
下の画像の様にカウントダウンが開始されます。
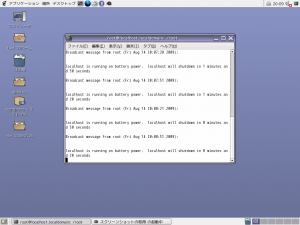
PowerChutePlusをGUIで操作する方法
コマンドで以下を実行
[root@localhost root] # /usr/lib/powerchute/
[root@localhost root] # ./xpowerchute
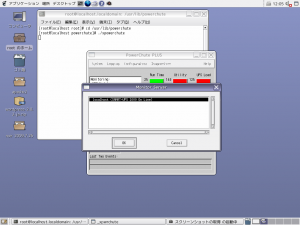
パスワードを入力します
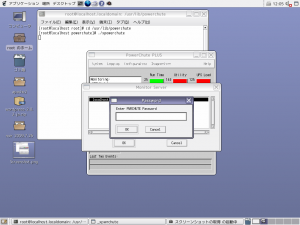
このように表示されます
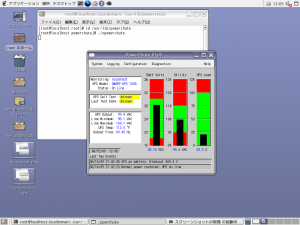
ふと思ったんですが、
せっかくGUIで操作できるのならアイコンをクリックして起動させたいもの。。。。。
クリックで起動できるよう設定します。
# vi /usr/lib/powerchute/ups.sh
#! /bin/bash
cd /usr/lib/powerchute
./xpowerchute
# vi Powerchute
[Desktop Entry]
Name=Powerchute
GenericName=UPS
Exec=/usr/lib/powerchute/ups.sh
Icon=/usr/lib/powerchute/battery.png
Terminal=false
Type=Application
StartupWMClass=Powerchute
Categories=UPS;
Categories=GTK;System;
Encoding=UTF-8
アイコン画像

まとめて保存したファイルをアップロードしておきます。
UPS.tar.gz
解凍後
シェルスクリプトとアイコンは下記の場所に保存します。
/usr/lib/powerchute/ups.sh
/usr/lib/powerchute/battery.png
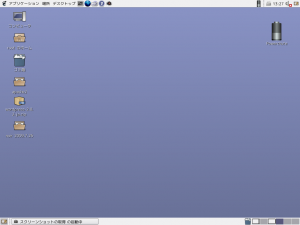
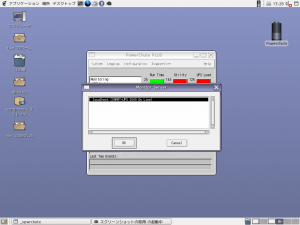
作成したアイコンをクリックすると起動します




最近のコメント