Tag Archives: Linux (Server) - Page 11

Perl モジュール Image::Magick VineLinux 5.0

新しいプログラムを考える上でどうしても必要になったのでインストール方法を探して
いましたが見つからなくて困っていました^^;

おそらくインストールできたので一応紹介しておきます。
※この方法はVineLinux(5.0)用です。
まず、普通に
# cpan
cpan[1]> install Image::Magick
とするとエラーでインストールできません。

下記のコマンドを実行します。
# apt-cache search ImageMagick | grep perl

おそらくImageMagick-perlが必要と言われるので
# apt-get install ImageMagick-perl
でインストールします。

再度下記を実行すると旨くインストールできます。
# cpan
cpan[1]> install Image::Magick

インストールできたか確認方法
# perl -MImage::Magick -e ”
と実行し何も出なかったらインストールに成功しています。

[おまけ]
もしもCan’t locate …………………..と出たらインストールされていません。

RSA暗号化について

暗号化の方法がとても気になったので調べてみました。
※特に可逆暗号化と公開鍵暗号についてです。

RSAの式(暗号化)
C = M^e (mod n)

調べてみたら呆気にとられるくらい簡単で単純です。

^(キャロット)は累乗という意味です。
modは除算した時に発生する余りを意味します。
Cが暗号化された文章を意味します。
Mは平文を意味します。
要するにCは平文Mをe乗してnで割った余りであると言うことになります。

今日は徹夜明けなので頭がボーっとしてまともに物事を考えられないので近いうちに
暗号化と複合化するプログラムを書いて見ます。

参考元:はやわかり RSA
参考元:ASCIIコードと文字の相互変換

VirtualHostでSSL接続

非常に困りました^^;
彼の野原 – FrontPage様よりワイルドカードを使った証明書を作成しました。

ですが、/etc/apache2/conf.d/ssl.confになんて記述してよいのか分からない(汗
エラーが起きてしまいます。

結局NameVirtualHost *:443を記述していないと言うことに気づくのに1時間ほどかかってしまいました^^;

追記した内容

NameVirtualHost *:443

<virtualHost *:443>
SSLEngine on
ServerName mail.orsx.net
DocumentRoot /var/www/html/webmail/
## certificate file path below
SSLCertificateFile /usr/share/ssl/certs/server.pem
SSLCertificateKeyFile /usr/share/ssl/certs/server.key
<directory /var/www/html/webmail/>
AllowOverride None
Options ExecCGI
Order allow,deny
Allow from all
</directory>
CustomLog /var/log/apache2/ssl_request_log 
"%t %h %{SSL_PROTOCOL}x %{SSL_CIPHER}x "%r" %b"
</virtualHost>

VineLinux 5 アップグレード

アップグレード後の問題点がいくつかありました。
まず、テキストエディタがエラーでバージョンアップできない。
UPS制御ソフトが起動しない。
SquirrelMail にログインできない。
Puttyが文字化けする。
ネットワークが不安定。
phpAdminで以下の様な警告が出る。
“お使いの PHP MySQL ライブラリのバージョン 5.1.36 が MySQL サーバのバージョン 5.0.27 と異なります。これは予期しない不具合を起こす可能性があります。”

解決しなければならないけどちょっと困った^^;

Apache2が自動起動しないので起動させるようにする。
# chkconfig apache2 on

Puttyはウインドウ→変換からUTF-8を選択して問題を解決。

パッケージマネージャーからMySQLをアップデートするとphpAdminの警告は表示されなくなった。

パッケージマネージャーから全てアップデートするとUPSの制御ソフトが起動した。

エディタ未だ解決できず。

ネットワークが繋がるのにクライアント側から繋がらなくなる謎の現象の解決
サーバとして利用するにVineLinux 5にはNetworkManagerが新しく入ってるのかな^^;
こいつがFedoraの時みたいに邪魔をするので停止する。
FedoraのようにGUIで停止できないのでコマンドで操作する。
# /etc/rc.d/init.d/NetworkManager stop
ネットワーク設定から編集してNetworkManagerで管理しないようにする。
代わりにinit/networkを利用するため起動する。
# /etc/init.d/network start
これで謎な問題を解決。

# vi /etc/sysconfig/network-scripts/ifcfng-eth1
=============================
DEVICE=eth1
BOOTPROTO=none
HWADDR=00:30:48:81:1F:73
ONBOOT=yes
IPADDR=192.168.24.5
NETMASK=255.255.255.0
GATEWAY=192.168.24.1
DNS1=192.168.24.1
DOMAIN=’orsx.net’
TYPE=Ethernet
NM_CONTROLLED=yes
IPV6INIT=no
USERCTL=no
=============================

解説しているサイトを見つけました。
従来のネットワーク設定

SquirrelMail にログインできないのは普通のメールソフトを使ってもログインできない事が判明。

POPサーバをdovecotへ変更したところ無事接続できるようになりました。
WebMailはSquirrelMail 1.5.2を使っていたものをバージョンダウンさせたところログインできるようになりました。
※ただし、愛称が悪いためか日本語表記できません。

SSLとバーチャルホストのトラブル

SSLの導入に再チャレンジして分かった事は最初から出来ていたとです(苦笑

問題はSSLとバーチャルホストとの関係
SSLはホスト名チェックで複数のサブドメインに対応しないので証明書で
複数のサブドメインを認識しなければならない。

これは、予想外な展開。確かにいわれてみれば当たり前ですが。。。。。
どうするかな^^;
正直今は時間無いんですよね(汗

そこで一つメモです。
SubjectAltName
これが大きなヒントになるのではないのかと考えています。

VineLinux SquirrelMail 1.5.2 アップグレード(日本語化)

 以前使用していたSquirrelMail-1.4.10a-jaは届いたメールが新しい順番に並ばなくメールを探すのが大変でした^^;
しかもXSS攻撃の対策がされていないとか。。。。。
それで今回、最新版?なのかな?にアップロードしました。

外付けHDDへ、バックアップをとります。
※ 私の環境では、/var/www/html/webmailにインストールしてあります。
# mv /var/www/html/webmail /media/BACKUP/webmail

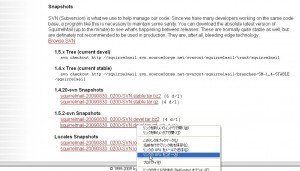
SquirrelMail 1.5.2をダウンロードする為に公式サイト(English)へ行きます。
(http://www.squirrelmail.org/download.php)
WS000038
URLをコピーします。

端末(ターミナル)に下記のコマンドを入力します。※ rootディレクトリに保存します。
# wget http://www.squirrelmail.org/countdl.php?fileurl=http%3A%2F%2Fsnapshots.squirrelmail.org%2Fsquirrelmail-20090830_0200-SVN.devel.tar.gz

日本語化ファイルをダウンロードします。
配布元サイト
(http://sourceforge.net/projects/squirrelmail/files/locales/1.4.9-20070106/)
# wget http://downloads.sourceforge.net/squirrelmail/ja_JP-1.4.9-20070106.tar.gz?modtime=1168106199&big_mirror=1

インストール先ディレクトリへ移動します。
# cd /var/www/html

SquirrelMail(本体)を解凍します。
# tar zxvf /root/squirrelmail-20090830_0200-SVN.devel.tar.gz
リネームします。
# mv squirrelmail.devel webmail

日本語化ファイルを解凍します。
# tar zxfv ja_JP-1.4.9-20070106.tar.gz
インストールします。
# ./install
インストール先を聞かれるので以下のように指定します。
Please enter path to your squirrelmail installation:/var/www/html/webmail

下記のディレクトリを作成します。
※ そのままアクセスするとエラーが発生します。
# mkdir /var/www/html/webmail/data
# mkdir /var/www/html/webmail/attach/
書き込めるようにパーミッションを変更します。
# chmod 777 /var/www/html/webmail/data
# chmod 777 /var/www/html/webmail/attach/

不要になったファイルやディレクトリの削除します。
# rm -f ./install
# rm -f /help
# rm -f /locale
# rm -f zxfv ja_JP-1.4.9-20070106.tar.gz
# rm -f ja_JP-1.4.9-20070106.tar.gz

設定します。
# cd /var/www/html/webmail
# ./configure

サーバーの選択をします。
SquirrelMail Configuration : Read: config_default.php (1.5.0)
———————————————————
Main Menu —
1. Organization Preferences
2. Server Settings
3. Folder Defaults
4. General Options
5. Themes
6. Address Books
7. Message of the Day (MOTD)
8. Plugins
9. Database
10. Languages

D. Set pre-defined settings for specific IMAP servers

C Turn color on
S Save data
Q Quit

Command >> d

SquirrelMail Configuration : Read: config_default.php
———————————————————
While we have been building SquirrelMail, we have discovered some
preferences that work better with some servers that don’t work so
well with others. If you select your IMAP server, this option will
set some pre-defined settings for that server.

Please note that you will still need to go through and make sure
everything is correct. This does not change everything. There are
only a few settings that this will change.

Please select your IMAP server:
cyrus = Cyrus IMAP server
uw = University of Washington’s IMAP server
exchange = Microsoft Exchange IMAP server
courier = Courier IMAP server
macosx = Mac OS X Mailserver
hmailserver = hMailServer
quit = Do not change anything
Command >> courier

imap_server_type = courier
default_folder_prefix = INBOX.
trash_folder = Trash
sent_folder = Sent
draft_folder = Drafts
show_prefix_option = false
default_sub_of_inbox = false
show_contain_subfolders_option = false
optional_delimiter = .
delete_folder = true

Press any key to continue…”Enter”

ログアウト時のディレクトリを指定します。
SquirrelMail Configuration : Read: config_default.php (1.5.0)
———————————————————
Main Menu —
1. Organization Preferences
2. Server Settings
3. Folder Defaults
4. General Options
5. Themes
6. Address Books
7. Message of the Day (MOTD)
8. Plugins
9. Database
10. Languages

D. Set pre-defined settings for specific IMAP servers

C Turn color on
S Save data
Q Quit

Command >> 1

SquirrelMail Configuration : Read: config_default.php (1.5.0)
———————————————————
Organization Preferences
1. Organization Name : SquirrelMail
2. Organization Logo : ../images/sm_logo.png
3. Org. Logo Width/Height : (308/111)
4. Organization Title : SquirrelMail $version
5. Signout Page :
6. Top Frame : _top
7. Provider link : http://www.squirrelmail.org/
8. Provider name : SquirrelMail

R Return to Main Menu
C Turn color on
S Save data
Q Quit

Command >> 5

When users click the Sign Out button they will be logged out and
then sent to signout_page. If signout_page is left empty,
(hit space and then return) they will be taken, as normal,
to the default and rather sparse SquirrelMail signout page.

[]: /
※ バーチャルホストに/var/www/html/webmailを割り当てていますので/を指定しました。

SquirrelMail Configuration : Read: config_default.php (1.5.0)
———————————————————
Organization Preferences
1. Organization Name : SquirrelMail
2. Organization Logo : ../images/sm_logo.png
3. Org. Logo Width/Height : (308/111)
4. Organization Title : SquirrelMail $version
5. Signout Page : /webmail
6. Top Frame : _top
7. Provider link : http://www.squirrelmail.org/
8. Provider name : SquirrelMail

R Return to Main Menu
C Turn color on
S Save data
Q Quit

Command >> r

ドメインを設定します。
SquirrelMail Configuration : Read: config_default.php (1.5.0)
———————————————————
Main Menu —
1. Organization Preferences
2. Server Settings
3. Folder Defaults
4. General Options
5. Themes
6. Address Books
7. Message of the Day (MOTD)
8. Plugins
9. Database
10. Languages

D. Set pre-defined settings for specific IMAP servers

C Turn color on
S Save data
Q Quit

Command >> 2

SquirrelMail Configuration : Read: config_default.php (1.5.0)
———————————————————
Server Settings

General
——-
1. Domain : example.com
2. Invert Time : false
3. Sendmail or SMTP : SMTP

A. Update IMAP Settings : localhost:143 (courier)
B. Update SMTP Settings : localhost:25

R Return to Main Menu
C Turn color on
S Save data
Q Quit

Command >> 1

The domain name is the suffix at the end of all email addresses. If
for example, your email address is jdoe@example.com, then your domain
would be example.com.

[example.com]: mail.orsx.net

SquirrelMail Configuration : Read: config_default.php (1.5.0)
———————————————————
Server Settings

General
——-
1. Domain : xxxxx.com
2. Invert Time : false
3. Sendmail or SMTP : SMTP

A. Update IMAP Settings : localhost:143 (courier)
B. Update SMTP Settings : localhost:25

R Return to Main Menu
C Turn color on
S Save data
Q Quit

Command >> r

言語を設定します。
SquirrelMail Configuration : Read: config_default.php (1.5.0)
———————————————————
Main Menu —
1. Organization Preferences
2. Server Settings
3. Folder Defaults
4. General Options
5. Themes
6. Address Books
7. Message of the Day (MOTD)
8. Plugins
9. Database
10. Languages

D. Set pre-defined settings for specific IMAP servers

C Turn color on
S Save data
Q Quit

Command >> 10

SquirrelMail Configuration : Read: config_default.php (1.5.0)
———————————————————
Language preferences
1. Default Language : en_US
2. Default Charset : iso-8859-1
3. Enable lossy encoding : false

R Return to Main Menu
C Turn color on
S Save data
Q Quit

Command >> 1

SquirrelMail attempts to set the language in many ways. If it
can not figure it out in another way, it will default to this
language. Please use the code for the desired language.

[en_US]: ja_JP

SquirrelMail Configuration : Read: config_default.php (1.5.0)
———————————————————
Language preferences
1. Default Language : ja_JP
2. Default Charset : iso-8859-1
3. Enable lossy encoding : false

R Return to Main Menu
C Turn color on
S Save data
Q Quit

Command >> 2

This option controls what character set is used when sending
mail and when sending HTML to the browser.

This option is used only when default language is ‘en_US’.

[iso-8859-1]: iso-2022-jp

SquirrelMailのバージョン非表示にする。
SquirrelMail Configuration : Read: config_default.php (1.5.0)
———————————————————
Language preferences
1. Default Language : ja_JP
2. Default Charset : iso-2022-jp
3. Enable lossy encoding : false

R Return to Main Menu
C Turn color on
S Save data
Q Quit

Command >> r

SquirrelMail Configuration : Read: config_default.php (1.5.0)
———————————————————
Main Menu —
1. Organization Preferences
2. Server Settings
3. Folder Defaults
4. General Options
5. Themes
6. Address Books
7. Message of the Day (MOTD)
8. Plugins
9. Database
10. Languages

D. Set pre-defined settings for specific IMAP servers

C Turn color on
S Save data
Q Quit

Command >> 4

SquirrelMail Configuration : Read: config_default.php (1.5.0)
———————————————————
General Options
1. Data Directory : ../data/
2. Attachment Directory : $data_dir
3. Directory Hash Level : 0
4. Default Left Size : 150
5. Usernames in Lowercase : false
6. Allow use of priority : true
7. Hide SM attributions : false
8. Allow use of receipts : true
9. Allow editing of identity : true
Allow editing of name : true
Remove username from header : false
10. Allow server thread sort : false
11. Allow server-side sorting : false
12. Allow server charset search : true
13. Enable UID support : true
14. PHP session name : SQMSESSID

R Return to Main Menu
C Turn color on
S Save data
Q Quit

Command >> 7

Hide SM attributions (y/n) [n]: y

SquirrelMail Configuration : Read: config_default.php (1.5.0)
———————————————————
General Options
1. Data Directory : ../data/
2. Attachment Directory : $data_dir
3. Directory Hash Level : 0
4. Default Left Size : 150
5. Usernames in Lowercase : false
6. Allow use of priority : true
7. Hide SM attributions : true
8. Allow use of receipts : true
9. Allow editing of identity : true
Allow editing of name : true
Remove username from header : false
10. Allow server thread sort : false
11. Allow server-side sorting : false
12. Allow server charset search : true
13. Enable UID support : true
14. PHP session name : SQMSESSID

R Return to Main Menu
C Turn color on
S Save data
Q Quit

Command >> r

ディレクトリを設定します。

SquirrelMail Configuration : Read: config.php (1.5.0)
———————————————————
Main Menu —
1. Organization Preferences
2. Server Settings
3. Folder Defaults
4. General Options
5. Themes
6. Address Books
7. Message of the Day (MOTD)
8. Plugins
9. Database
10. Languages

D. Set pre-defined settings for specific IMAP servers

C Turn color on
S Save data
Q Quit

Command >> 4

1. Data Directory : /var/local/squirrelmail/data/
2. Attachment Directory : /var/local/squirrelmail/attach/
3. Directory Hash Level : 0
4. Default Left Size : 150
5. Usernames in Lowercase : false
6. Allow use of priority : true
7. Hide SM attributions : true
8. Allow use of receipts : true
9. Allow editing of identity : true
Allow editing of name : true
Remove username from header : false
10. Allow server thread sort : false
11. Allow server-side sorting : false
12. Allow server charset search : true
13. Enable UID support : true
14. PHP session name : SQMSESSID
15. Location base :

R Return to Main Menu
C Turn color on
S Save data
Q Quit

Command >> 1

Specify the location for your data directory.
The path name can be absolute or relative (to the config directory).
You probably need to create this directory yourself. Here are two examples:
Absolute: /var/local/squirrelmail/data/
Relative: ../data/
Relative paths to directories outside of the SquirrelMail distribution
will be converted to their absolute path equivalents in config.php.

Note: There are potential security risks with having a writable directory
under the web server’s root directory (ex: /home/httpd/html).
For this reason, it is recommended to put the data directory
in an alternate location of your choice.

[/var/local/squirrelmail/data/]: /var/www/html/webmail/data

1. Data Directory : /var/www/html/webmail/data/
2. Attachment Directory : /var/local/squirrelmail/attach/
3. Directory Hash Level : 0
4. Default Left Size : 150
5. Usernames in Lowercase : false
6. Allow use of priority : true
7. Hide SM attributions : true
8. Allow use of receipts : true
9. Allow editing of identity : true
Allow editing of name : true
Remove username from header : false
10. Allow server thread sort : false
11. Allow server-side sorting : false
12. Allow server charset search : true
13. Enable UID support : true
14. PHP session name : SQMSESSID
15. Location base :

R Return to Main Menu
C Turn color on
S Save data
Q Quit

Command >> 2

Path to directory used for storing attachments while a mail is
being composed. The path name can be absolute or relative (to the
config directory). Here are two examples:
Absolute: /var/local/squirrelmail/attach/
Relative: ../attach/
Relative paths to directories outside of the SquirrelMail distribution
will be converted to their absolute path equivalents in config.php.

Note: There are a few security considerations regarding this
directory:
1. It should have the permission 733 (rwx-wx-wx) to make it
impossible for a random person with access to the webserver
to list files in this directory. Confidential data might
be laying around in there.
Depending on your user:group assignments, 730 (rwx-wx—)
may be possible, and more secure (e.g. root:apache)
2. Since the webserver is not able to list the files in the
content is also impossible for the webserver to delete files
lying around there for too long.
3. It should probably be another directory than the data
directory specified in option 3.

[/var/local/squirrelmail/attach/]: /var/www/html/webmail/attach/

General Options
1. Data Directory : /var/www/html/webmail/data/
2. Attachment Directory : /var/www/html/webmail/attach/
3. Directory Hash Level : 0
4. Default Left Size : 150
5. Usernames in Lowercase : false
6. Allow use of priority : true
7. Hide SM attributions : true
8. Allow use of receipts : true
9. Allow editing of identity : true
Allow editing of name : true
Remove username from header : false
10. Allow server thread sort : false
11. Allow server-side sorting : false
12. Allow server charset search : true
13. Enable UID support : true
14. PHP session name : SQMSESSID
15. Location base :

R Return to Main Menu
C Turn color on
S Save data
Q Quit

Command >> q

You have not saved your data.
Save? [Y/n]: y

これでインストール完了です。

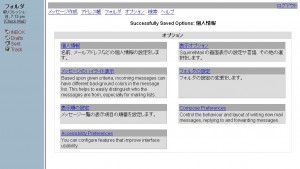
成功するとログイン後以下の様な表示になります。
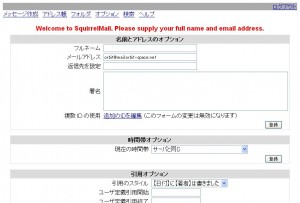
WS000033
メールアドレスや、その他の設定をここなうとオプション画面になります。

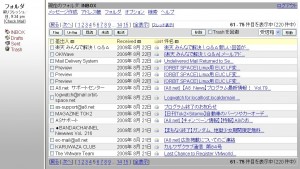
WS000034

テーマを変更し、メールボックスを表示したところです。
WS000037

凄いカッコいい!!
メールが順番に並んでるのもとても嬉しいですね~
一つ残念なのが検索すると検索した単語が激しく文字化けするところですね・・・
今度、解決方法を探してみます。

VineLinux 4.2 Smart-UPS PowerChutePlus

以前紹介したAPC製 UPS(無停電電源装置)の記事
Smart-UPS 1000 無停電電源装置 バッテリー交換

あれだけではUPSとしての利用価値が半減以下になってしまいます。
今回は(私が調べたところ)まだ何処も紹介していないですが
VineLinux 4.2で構築したサーバーでPowerChutePlusを使い
停電になったら自動的にシャットダウンさせるように設定してみます。

本来Smart-UPS 1000をPCとつなぐ為には専用のシリアルケーブル(9ピン)を
使用します。

しかし、私はSmart-UPS 1000本体だけしか持っていません^^;
しかも、ごく普通のシリアルケーブルを購入して変換アダプターも探し出した後。。。。
純正品を買ったら5000円程するようです。

『マジですか・・・・・・・』

なんかここまで来たらヤケクソでしょうw
買ったシリアルケーブルは他には使い道無いので気合で自作します。

先ず、下記を部屋から持ってきます。
半田小手
ヤニ入り半田
半田吸い取り線
万力みたいな固定する道具
小手拭き
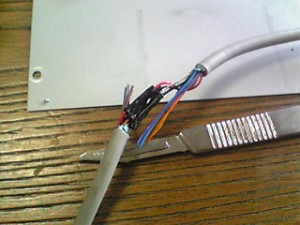
皮むき(今回はメスで代用)
熱収縮管
エポキシパテ

シリアルケーブルの向きを決めます。
オスの方がUPS側、メスの方がPC側

断面を見ると右から順番に
5. 4. 3. 2. 1
9. 8. 7. 6
と言う順番です。

1   DCD   茶
2   RxD   赤
3   TxD   燈
4   DTR   黄
5   GND   緑
6   DSR   青
7   RTS   紫
8   CTS   灰
9    RI   黒
G  剥き出し

ケーブルを好きな所で豪快にちょん切ります。
Image108

以下の図はSmart-UPSのシリアルケーブルの自作様より引用
PC側 ( 9 pin メス) ←→ UPS側 ( 9 pin オス)
2 ——– 2
3 ——– 1
5 ——– 9
G ——- G ( シールド )
その他は、すべて NC

NCとは繋がっていないという事を意味します。
つまり、下記のように半田で繋げていきます。

PC側 ( 9 pin メス) ←→ UPS側 ( 9 pin オス)
剥き出し —– 剥き出し
赤 —– 赤
燈 —– 茶
緑 —– 黒

必要なリード線を剥いでいきます。
Image109

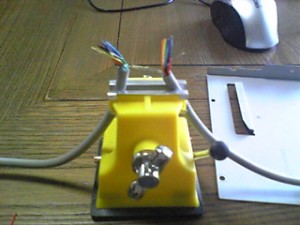
万力で固定し、半田で止めていきます。
Image110

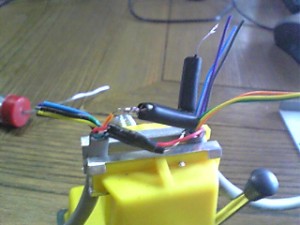
接着したらこまめに熱収縮管で絶縁していきます。
Image111

Image112

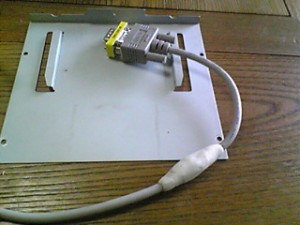
全て終わったらパテでショートや接触不良を防ぐ為に固定します。
Image114
こんな感じです。

つづいてPowerChutePlus for Linuxをダウンロードしていきます。
VineLinux 4.2に最も近い環境であると考えられるRedHat 9用のPowerChutePlus
を利用します。
PowerChutePlus-4.5.3-1.i386.rpm
がベターでしたが、どうもサポートが終了したり
サイトが閉鎖したみたいですので今回は
Download mirrors for PowerChutePlus-4.5.3-1_RedHat.i386.rpm (2.45 MB):
ここからPowerChutePlus-4.5.3-1_RedHat.i386.rpmをダウンロードして来ます。

一応、当サイトでもミラーとして公開します。
PowerChutePlus-4.5.3-1_RedHat.i386
※利用規約等が見当たらなかったのでミラーとしてサーバーにUploadしました。
何か不都合がありましたらお手数をおかけしますが、お知らせください。

普通にインストールしますと
libstdc++-libc6.2-2.so.3 は PowerChutePlus-4.5.3-2.i386 に必要とされています
というようなエラーが出ます。

ですのでlibstdc++-libc6.2-2.so.3をインストールしようとしますが
単体では存在しません。

libstdc++2_10の中にバーチャルパッケージとして含まれているようですので、
インストールします。
[root@localhost root]# apt-get install libstdc++2_10
しかし、以下の様な文が表示されます。
E: 未解決の依存情報です。’apt-get -f install’ を実行してみてください(又は
解決パッケージを明示してください)。

[root@localhost lib]# apt-get -f install
を実行し、もう一度
[root@localhost root]# apt-get install libstdc++2_10
を実行するとインストールできるかと思います。

ディレクトリ/usr/libへ移動します。
[root@localhost lib]# cd /usr/lib

シンボリックを貼ります。
[root@localhost lib]# ln -s libstdc++-libc6.3-2.so.3 libstdc++-libc6.2-2.so.3

rootディレクトリへ移動します。
[root@localhost lib]# cd

インストールを開始します。
何故かこのパッケージは微妙にタイトルのバージョンと内容が異なりますので一応
書いておきますが、中身はPowerChutePlus-4.5.3-2.i386です。
[root@localhost root]# rpm -ivh PowerChutePlus-4.5.3-1_RedHat.i386.rpm
準備中… ########################################### [100%]
1:PowerChutePlus ########################################### [100%]
You must run /usr/lib/powerchute/Config.sh to configure PowerChute plus

こんな感じで問題なくインストール出来るかと思います。

設定を開始します。
[root@localhost root]# /usr/lib/powerchute/Config.sh
———————————————————————–
PowerChute Plus for Linux v4.5.3 Configuration Script
Copyright American Power Conversion 2001
———————————————————————–

1) Matrix-UPS
2) Smart-UPS
3) Back-UPS
4) Back-UPS Pro
5) Symmetra Power Array
6) Smart-UPS DP

Which APC Hardware will PowerChute Plus for UNIX be running with [?] 2

Smart-UPS 1000なので2を選択

—————————————————————————-
The Measure-UPS is a device which is designed to perform environmental
monitoring in conjunction with PowerChute Plus for UNIX
—————————————————————————-

Do you currently have a Measure-UPS attached to the UPS? [y/n] n

Measure-UPSを使っているかと聞かれますのでnを選択

—————————————————————————-
PowerChute Plus for UNIX is able to monitor other hosts. However, in order
to monitor other hosts TCP/IP must be installed. If you do not have
TCP/IP installed, answer ‘n’ to the following question.
—————————————————————————-

Do you currently have TCP/IP Installed? [y/n] y

インターネットに繋がってるかと聞かれますのでyを選択

—————————————————————————-
If you will be using the Motif version of the User Interface on a
monochrome monitor, using the Monochrome Coloring scheme is recommended.

—————————————————————————-
1) Use Default Color scheme
2) Use Monochrome Color scheme

Which color scheme do you wish to use [1]? 1

カラーかときかれますので1を選択

—————————————————————————-
PowerChute Plus for UNIX requires complete control of the serial port. No
processes, including gettys, are allowed to be accessing the port.
Therefore, the serial port you select must NOT be enabled for logins. To
ensure that PowerChute Plus for UNIX has control of the serial port, make
sure that it is not enabled for logins. To disable the port for logins
consult the PowerChute Plus for UNIX manual.
—————————————————————————-

1) /dev/ttyS0
2) /dev/ttyS1
3) Other

Which serial device will be dedicated to PowerChute Plus for UNIX [?] 1

シリアルケーブルを何処に繋げているかと聞かれますので
シリアルポート1なので1を選択

—————————————————————————-
Command files may be executed with root privileges or with the
privileges you assign to the pwrchute account (allowing you to
customize command file execution according to your system
requirements).
—————————————————————————-

Do you want to execute command files as root? [y/n] y

rootでインストールを続けるかと聞かれますのでyを選択

—————————————————————————-
E-mail may be sent with root privileges or with the privileges you
assign to the pwrchute account.
—————————————————————————-

Do you want to send e-mail as root? [y/n] y

root宛てにメールを送信するように指定するかと聞かれますのでyを選択

—————————————————————————-
PRODUCT : PowerChute Plus for UNIX
DEDICATED TTY : /dev/ttyS0
UPS TYPE : Smart-UPS
Measure-UPS INSTALLED : FALSE
INSTALLING AS ROOT : TRUE
TCP/IP Installed : TRUE
RUN COMMAND FILES AS ROOT : TRUE
SEND EMAIL AS ROOT : TRUE
—————————————————————————-

Are the above selections correct? [y/n] y

確認画面が出るので問題なければyを選択

Checking for binary compatibility…
binary compatibility VERIFIED

/dev/ttyS0 verified as a valid tty

The following Port validations for /dev/ttyS0 may take a few moments….
/dev/ttyS0 appears to be a local control port

making backup copy of shutdown files…
modifying shutdown files….

UPS communications on /dev/ttyS0 verified
Done.

—————————————————————————-
Due to the amount of time it can take Unix platforms to shutdown,
it is sometimes necessary to increase the eeprom parameter UpsTurnOffDelay
within the UPS. This is in order to allow sufficient time for the
Operating System to shutdown completely.
—————————————————————————-
* Doing this is recommended for the Linux Operating System *
—————————————————————————-
Do you wish to increment the UpsTurnOffDelay to its next highest
value now? [y/n] y

何か色々出ていますがデフォルトでかまわないのでyを選択します。

UpsTurnOffDelay successfully set at 180.

The PowerChute plus User Interface will prompt you for a password when you attempt
to connect to the upsd daemon running on this machine. This password is the
password of the pwrchute user account.

Adding a pwrchute user account
Please set the password for the pwrchute user account.
Changing password for user pwrchute.
New password:
Retype new password:
パスワードを決める必要があります。
passwd: all authentication tokens updated successfully.
—————————————————————————-
PowerChute Plus for UNIX Installation complete. You will need to reboot
in order to start the application
—————————————————————————-

これでインストール終了です。

気になるので一応自動起動するように設定します。(たぶん必要無いかも)
[root@localhost root] # chkconfig upsd on
[root@localhost root] # chkconfig –list upsd
upsd    0:off  1:off  2:on  3:on  4:on  5:on  6:off

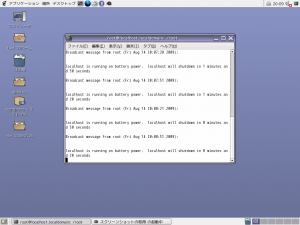
ちなみにUPSの電源を抜き端末(ターミナル)を起動すると
下の画像の様にカウントダウンが開始されます。
Screenshot

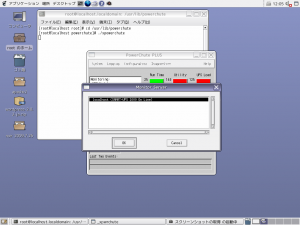
PowerChutePlusをGUIで操作する方法
コマンドで以下を実行
[root@localhost root] # /usr/lib/powerchute/
[root@localhost root] # ./xpowerchute

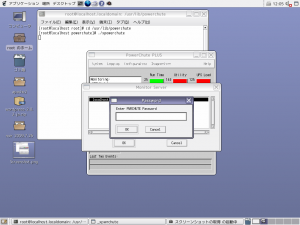
Screenshot

パスワードを入力します
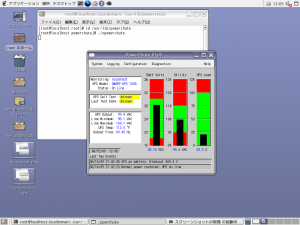
Screenshot-1

このように表示されます
Screenshot-2

ふと思ったんですが、
せっかくGUIで操作できるのならアイコンをクリックして起動させたいもの。。。。。
クリックで起動できるよう設定します。
# vi /usr/lib/powerchute/ups.sh

#! /bin/bash
cd /usr/lib/powerchute
./xpowerchute

# vi Powerchute

[Desktop Entry]
Name=Powerchute
GenericName=UPS
Exec=/usr/lib/powerchute/ups.sh
Icon=/usr/lib/powerchute/battery.png
Terminal=false
Type=Application
StartupWMClass=Powerchute
Categories=UPS;
Categories=GTK;System;
Encoding=UTF-8

アイコン画像
battery

まとめて保存したファイルをアップロードしておきます。
UPS.tar.gz

解凍後
シェルスクリプトとアイコンは下記の場所に保存します。
/usr/lib/powerchute/ups.sh
/usr/lib/powerchute/battery.png

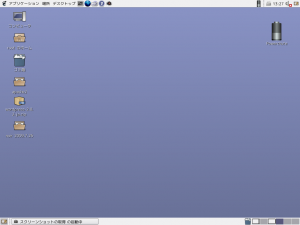
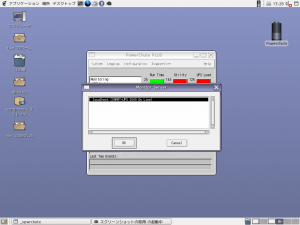
作成したアイコンをクリックすると起動します
Screenshot-3

Screenshot-4

Vine Linux オリジナルイメージ作成

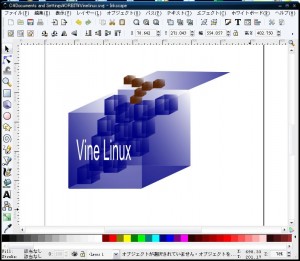
Vine Linuxがお気に入りでブログに使う画像作成と言う事で
Vineの葡萄をモチーフに画像を作ってみました。

ソフトはInkscapeを使用しました。

素人が描いた下手なイメージです(汗
Vineの作者や作成に関わってる方すみません(´ヘ`;)とほほ・・

ws000061


ws000062


ws000063

無いと思いますが何か利用価値がありましたらご自由にお使い下さい。

PHP Shift_JIS 文字化け .htaccess 設定

HTTP出力文字コードをEUC-JPでphp.iniを設定しているサーバーで
Shift_JISで文字化けした場合の対処方法です。

.htaccess
に下記を追記して644(-rw-r–r–)でアップロード

php_value "output_buffering" "Off"
php_value "default_charset" "Shift_JIS"
php_value "output_handler" "none"
php_value "mbstring.language" "Japanese"
php_value "mbstring.internal_encoding" "SJIS"
php_value "mbstring.http_input" "auto"
php_value "mbstring.http_output" "SJIS"
php_value "mbstring.encoding_translation" "off"
php_value "mbstring.substitute_character" "none"

基本的にPHPでShift_JISの使用は好まれませんが、
どうしてもShift_JISで公開したい方のために紹介しました。

OCN OP25B対策回避 Vine Linux Postfix

ここ半年ほど、いくら挑戦してもことごとく敗北していましたが
先ほど成功したので紹介します。

先ずVine Linuxで自宅サーバー様の
SMTP-AUTH編
を参考にしてCyrus SASLのインストールと設定をしましょう。

POPをインストールしていない場合は
Homeserver on Vine Linux様を参考にCourier-IMAPをインストールします。

ここからOCN専用の設定を行って行きます。
# vi /etc/postfix/main.cf

relayhost = [smtp.****.ocn.ne.jp]
↑#を外してOCNのSMTPを指定

※後ろに:587を付けるとエラーになるので付けてはいけない
※書類にはsmtp.vc****.ocn.ne.jpと記載されている場合があります。
必ずvcを消しましょう。でないとウィルスチェックサービスで送信できません。

参考元:№3152 OP25B対策とOCN

一番最後に追記
smtp_sasl_auth_enable = yes
smtp_sasl_password_maps = hash:/etc/postfix/smtpauth
smtp_sasl_security_options = noanonymous
smtp_sasl_mechanism_filter = plain, login

# vi /etc/postfix/smtpauth←SMTP認証情報が書かれたファイルを作成

[smtp.****.ocn.ne.jp] name:password

※後ろに:587を付けるとエラーになるので付けてはいけない
※書類にはsmtp.vc****.ocn.ne.jpと記載されている場合があります。
必ずvcを消しましょう。でないとウィルスチェックサービスで送信できません。

※nameにはメールアドレスの@から左側を指定します
passwordにはOCNのメールアカウント用パスワードを指定します。
ネームとパスワードの間には:が要ります。絶対お忘れなく。

# chmod 604 /etc/postfix/smtpauth←権限の変更
# postmap /etc/postfix/smtpauth←データベース化

# /etc/rc.d/init.d/postfix restart Postfixの再起動

これで対策回避完了です。

################################################################
# 200/5/29 下記追記 Out: 451 Server configuration error の回避について
################################################################

Out: 451 Server configuration error
送信は出来ても受信がエラーで上記のような結果が返って来る場合は
下記の設定をmain.cfに行いましょう。

smtpd_recipient_restrictions =
permit_sasl_authenticated,
permit_mynetworks,
check_relay_domains,
reject

私の環境では

smtpd_recipient_restrictions =
permit_mynetworks,
regexp:/etc/postfix/recipient_checks.reg,
permit_sasl_authenticated,
check_relay_domains,
reject

このように設定しております。