Category Archives: Linux (Server) - Page 17

クラッキング(ハッキング)ツール PHP Haxplorer.a

今回世界のハッカーが作ったウイルスやクラッキングツールを拝める機会がありまして
ちょっとしたクラッキングツールを紹介しようと考えました。

今回紹介するクラッキングツールはサーバーを遠隔操作できるツールです。
パーミッションやユーザーの権限の重要性がよく分かります。

Haxplorer.a
をターゲットのサーバーにアップロードします。
PHPなので属性の設定は必要ありません。
ただブラウザから表示するだけです。
※残念ながらダウンロードできるサイトを紹介することはできません。

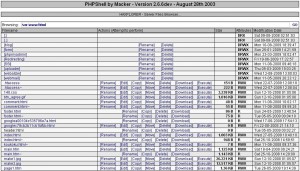
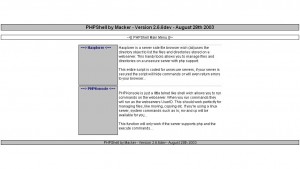
以下の画像が表示されます。
WS000003

サーバーのファイルを操作することが可能です。
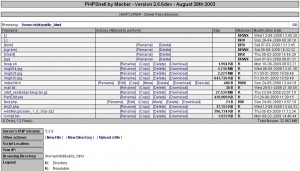
WS000004

権限があるディレクトリならどこでも自由に行き来、閲覧できます。
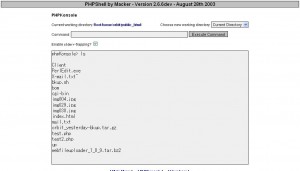
WS000005

Apacheユーザーでで実行させているのでしょうか
コマンドも実行できます。
これがもしRootで動いていたら。。。。。
なんて考えるととても恐ろしいです。
WS000002

これらのことから分かった事は
このようなツールを使えば知識の無い人でもサーバーを遠隔操作することが可能です
Windowsを利用した、なんちゃってサーバーは乗っ取られる可能性が十分ありますし
権限の設定はとても重要だという事です。

このツールはClam AntiVirusにより、正確に検知し駆除できる事を確認しました。

VineLinux 4.2 Clam AntiVirus

サーバーにClam AntiVirusをインストールしてみました
以前もClam AntiVirusをインストールしていましたが
VineLinuxのapt-getでインストールしたClam AntiVirusはバージョンが古く
サーバーのLOGにアホみたいに警告が残るので今回以下の組み合わせで
インストールしました。

Clam AntiVirus + clamav-update

clamav-updateとはclamav-update自身とClam AntiVirusを
自動的にアップグレードしてくれるソフトです。

# apt-get upgrade
# apt-get install clamav
で自動的にインストールし

[root@localhost root]# wget http://osdn.dl.sourceforge.jp/clamav-update/26300/clamav-update-2.2.3.tar.gz
--00:02:54--  http://osdn.dl.sourceforge.jp/clamav-update/26300/clamav-update-2.2.3.tar.gz
           => `clamav-update-2.2.3.tar.gz'
osdn.dl.sourceforge.jp をDNSに問いあわせています... 202.221.179.23
osdn.dl.sourceforge.jp|202.221.179.23|:80 に接続しています... 接続しました。
HTTP による接続要求を送信しました、応答を待っています... 200 OK
長さ: 26,941 (26K) [application/x-gzip]

100%[====================================>] 26,941        --.--K/s

00:02:55 (279.43 KB/s) - `clamav-update-2.2.3.tar.gz' を保存しました [26941/26941]

このようにwgetコマンドで
clamav-update-2.2.3.tar.gzをダウンロードしてきます。

[root@localhost root]# tar zxvf clamav-update-2.2.3.tar.gz
clamav-update-2.2.3/
clamav-update-2.2.3/changelog.ja.utf-8.txt
clamav-update-2.2.3/clamav-update-update.conf
clamav-update-2.2.3/clamav-update.conf
clamav-update-2.2.3/clamav-update.pl
clamav-update-2.2.3/COPYING
clamav-update-2.2.3/INSTALL
clamav-update-2.2.3/install.command
clamav-update-2.2.3/INSTALL.ja.utf-8
clamav-update-2.2.3/install.sh
clamav-update-2.2.3/README.en.txt
clamav-update-2.2.3/README.ja.utf-8.txt
clamav-update-2.2.3/template/
clamav-update-2.2.3/template/clamav-update.conf

解凍後clamav-update-2.2.3へ移動しinstall.shを実行します。

[root@localhost root]# cd clamav-update-2.2.3
[root@localhost clamav-update-2.2.3]# ./install.sh

ROOTディレクトリに戻り解凍したディレクトリと
ダウンロードしてきた圧縮ファイルを削除します。

[root@localhost clamav-update-2.2.3]# cd
[root@localhost root]# rm -rf clamav-update-2.2.3
[root@localhost root]# rm -f clamav-update-2.2.3.tar.gz

設定ファイルの編集

[root@localhost root]# vi /usr/local/etc/clamav-update.conf
#$Setting{option}->{src} = 'http://jaist.dl.sourceforge.net/sourceforge/clamav';
#を消去して有効化
$Setting{option}->{src} = 'http://jaist.dl.sourceforge.net/sourceforge/clamav';
[root@localhost root]# vi /etc/freshclam.conf
Exampleを無効化するために#を追記
#Example

# By default when started freshclam drops privileges and switches to the
# "clamav" user. This directive allows you to change the database owner.
# Default: clamav (may depend on installation options)
#DatabaseOwner clamav
実行ユーザーをROOTにするため下記に変更
DatabaseOwner root

# Run command when freshclam reports outdated version.
# In the command string %v will be replaced by the new version number.
# Default: disabled
#OnOutdatedExecute command
OnOutdatedExecute /usr/local/bin/clamav-update.pl --config /usr/local/etc/clamav-update.conf
Clam AntiVirusアップデート時にclamav-updateを実行

DatabaseMirror database.clamav.net
ウィルスデータベース入手元を日本に変更
DatabaseMirror db.jp.clamav.net
# vi /etc/clamd.conf
Exampleを無効化するため#を追記
#Example

LogFile /var/log/clamd.log
ログの保存場所の変更

Clam AntiVirusの起動

[root@localhost root]# /etc/rc.d/init.d/clamd start
Starting ClamAV Daemon:                                    [  OK  ]

ウィルス定義ファイル更新

[root@localhost root]# freshclam
ClamAV update process started at Tue Aug 11 00:16:14 2009
main.cvd is up to date (version: 51, sigs: 545035, f-level: 42, builder: sven)
WARNING: getfile: daily-9451.cdiff not found on remote server (IP: 120.29.176.126)
WARNING: getpatch: Can't download daily-9451.cdiff from database.clamav.net
Trying host database.clamav.net (218.44.253.75)...
WARNING: getfile: daily-9451.cdiff not found on remote server (IP: 218.44.253.75)
WARNING: getpatch: Can't download daily-9451.cdiff from database.clamav.net
Trying host database.clamav.net (219.94.128.99)...
WARNING: getfile: daily-9451.cdiff not found on remote server (IP: 219.94.128.99)
WARNING: getpatch: Can't download daily-9451.cdiff from database.clamav.net
WARNING: Incremental update failed, trying to download daily.cvd
Trying host database.clamav.net (203.178.137.175)...
Downloading daily.cvd [100%]
daily.cvd updated (version: 9672, sigs: 63892, f-level: 43, builder: acab)
Database updated (608927 signatures) from database.clamav.net (IP: 203.178.137.175)

自動起動設定

[root@localhost root]# chkconfig clamd on
[root@localhost root]# chkconfig --list clamd
clamd           0:off   1:off   2:off   3:on    4:on    5:on    6:off

自動スキャンの設定は多くのサイトで紹介されているんで省略させていただきます。

インストールを含め現在エラーは見当たらないので紹介させていただきました。
RedHat系でclamav-updateのインストールについての記事は
見受けられませんでしたけど無事動いてるのかな^^;?

まぁ、サーバー側からまだ何も怒られていないので良しとしましょう(笑

参考元
VineLinuxで自宅サーバー
ARISONサーバー

(追記)
LOGを見たら
ウイルス移動先ディレクトリやバックアップディレクトリを何度もチェックされるという
なんとも困った事が発生してので解決方法を
[root@localhost root]# echo “/var/clamav/virus/” >> clamscan.exclude
[root@localhost root]# echo “/media/BACKUP/” >> clamscan.exclude
これでスキャン対象外にする事ができます。

色々なサイトを見回って
あまり気に入るスクリプトが無かったので
多くのサイトで紹介されているスクリプトを改造して使おうかと考えました。

新たに付け加えた機能としては
# vi /var/log/clamav.log
にLOGを取りながら見つけたウイルスは
# /var/clamav/virus
へ隔離します。
yumコマンドはRedHad系では使えないので
今回clamav-updateもインストールした分けですし
freshclamを実行するように書き換えました。

#!/bin/bash

PATH=/usr/bin:/bin

# lof file
LOG='/var/log/clamav.log'

# clamd update
freshclam > $LOG

# excludeopt setup
excludelist=/root/clamscan.exclude
if [ -s $excludelist ]; then
    for i in `cat $excludelist`
    do
        if [ $(echo "$i"|grep /$) ]; then
            i=`echo $i|sed -e 's/^([^ ]*)/$/1/p' -e d`
            excludeopt="${excludeopt} --exclude-dir=$i"
        else
            excludeopt="${excludeopt} --exclude=$i"
        fi
    done
fi

# virus scan
CLAMSCANTMP=`mktemp`
clamscan -i --move=/var/clamav/virus -r ${excludeopt} / >> $LOG 2>&1
[ ! -z "$(grep FOUND$ $LOG)" ] && 

# report mail send
grep FOUND$ $LOG | mail -s "Virus Found in `hostname`" orbit

grep FOUND$ $CLAMSCANTMP | mail -s “Virus Found in `hostname`” orbit
この設定ではorbitに送信されることになってますのでorbitを好きなユーザーに変更してください。

実行例)
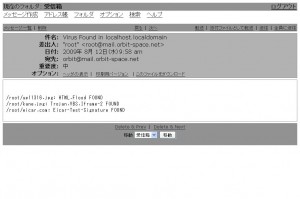
メールで捕まったウイルスリストを送信します。
今回比較的新しいあの猛威を振るったHDDをフォーマットするウイルスも
対応しているか試してみましたところ無事隔離された事が分かります。
WS000000

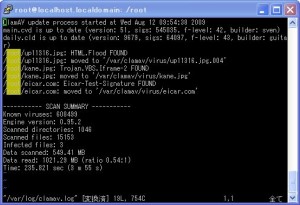
サーバーに保存されているLOGです。
アップデートされたかも詳しく書かれています。
WS000001

これでコレクションの標本も増えると一石二鳥です^^
SSH 鍵交換方式による接続設定

この鍵交換方式も凄く悩まされていました^^
簡単なんですけどね・・・・・・
root権限でペアの鍵を作ってRootのLoginを禁止している・・・・・・・
何て矛盾でしょうw
今日の朝気づいたので試したら見事接続に成功しました^^

#vi /etc/ssh/sshd_config
管理者権限で設定ファイルを変更します。

鍵交換方式による接続のみ認証
PasswordAuthentication no

ROOTでのLOGINを禁止
PermitRootLogin no

PassなしのユーザーのLOGINを禁止
PermitEmptyPassword no

特定ユーザーのみ接続を許可
AllowUsers ユーザー名

暗号強度を1024Btに強化
ServerKeyBits 1024

SSHサーバーの再起動
# /etc/rc.d/init.d/sshd restart

SSHに接続するユーザーへ切り替える
# su – SSH接続ユーザー名

鍵のペアを作成

# ssh-keygen -t rsa
Generating public/private rsa key pair.
Enter file in which to save the key (/home/SSH接続ユーザー名/.ssh/id_rsa):
保存場所を聞かれるがEnterを押す
Created directory '/home/SSH接続ユーザー名/.ssh'.
Enter passphrase (empty for no passphrase):
Passを入力する。
Enter same passphrase again:
確認の為、再度Passを入力する。
Your identification has been saved in /home/SSH接続ユーザー名/.ssh/id_rsa.
Your public key has been saved in /home/SSH接続ユーザー名/.ssh/id_rsa.pub.
The key fingerprint is:
xx:xx:xx:xx:xx:xx:xx:xx:xx:xx:xx:xx:xx:xx:xx:xx SSH接続ユーザー名@orsx.net

鍵のペアを確認する

#ls -al .ssh/
drwx------  2 SSH接続ユーザー名 SSH接続ユーザー名 4096  8月10日 06:45 ./
drwxr-xr-x 27 SSH接続ユーザー名 SSH接続ユーザー名  4月26日 08:36 ../
-rw-------  1 SSH接続ユーザー名 SSH接続ユーザー名 1743  8月10日 06:45 id_rsa
-rw-r--r--  1 SSH接続ユーザー名 SSH接続ユーザー名  409  8月10日 06:45 id_rsa.pub

ディレクトリ.sshへ移動
$ cd ~/.ssh

公開鍵のリネーム
mv ~/.ssh/id_rsa.pub ~/.ssh/authorized_keys

秘密鍵をHTTP公開でディレクトリへ移動
# cp ~/.ssh/id_rsa ~/public_html/id_rsa

FTPを利用し、ダウンロードします。
FTPが利用できない環境であればブラウザからダウンロードします。
※必ずダウンロード後は削除してください。

PuTTY Download Page
ここからPuTTYgenをダウンロードしてputtygen.exeを実行します。

Loadをクリックしてファイルの種類(T)でAll Files(*.*)に設定し
先ほどダウンロードしたid_rsaを選択します。

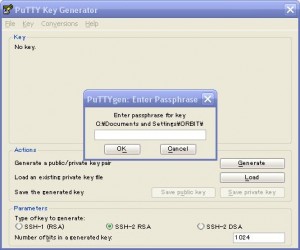
下記の表示が出たら鍵を作成した時に使ったPassを入力します。
WS000024

変換が完了したらSave private keyをクリックします。
保存するファイル名を聞かれますので適当に名前を付けます。

hdk の自作ソフトの紹介
よりPuTTYjp Version 0.60-jp20070603をダウンロードし、解凍する。
解凍後、フォルダー内のputtyjp.exeを実行

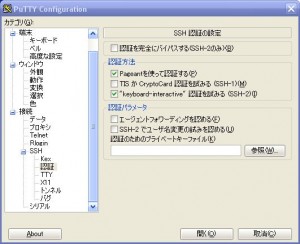
左側のメニューからSSH>認証を選択
WS000027
認証のためのプライベートキーファイル(K)を選択
先ほど変換した秘密鍵を選択します。

WS000025
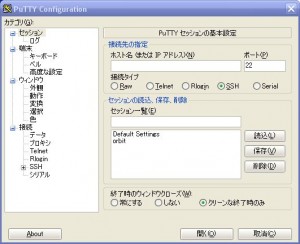
ホスト名(またはIPアドレス)(N)を設定し、セッション一覧(E)に適当な名前を入力し
保存します。
※次回起動する場合、このセッションを読み込ませて起動します。

保存したセッションを選択し開く(O)をクリックし
黒い画面が出たら接続するユーザー名を入力しパスワードを入力します。
無事LOGINできたらSSH接続設定終了です。

参考元
Homeserver on Vine Linux – Vine Linuxで自宅サーバーを作ろう
VineLinuxで自宅サーバー

WordPress 高速化 PHPアクセラレータ 簡単導入

もう半年位悩んでいましたWordPressが物凄く遅い件に関して
今回解決する方法を試してみました。

PHPアクセラレータを導入して高速化を図る。
と言う方法です。
PHPアクセラレータと言っても
何種類かあるようなのでその中のAPCと言うものを利用しPHPの処理を最適化します。

コマンドphpizeを実行して以下の様に表示されれば恐らく
php5-develが入っています。

[root@localhost root]# phpize
Cannot find config.m4.
Make sure that you run '/usr/bin/phpize' in the top level source directory of the module

こんな風に表示されていない場合はphp5-develが入っていない可能性があります。
インストールしましょう。

#apt-get install php5-devel

APC
ここからダウンロードするAPCのURLを確認します。
今回はAPC-3.0.19.tgzを使用しました。

コマンドwgetでファイルを/rootへダウンロードします。

[root@localhost root]# wget http://pecl.php.net/get/APC-3.0.19.tgz
--14:15:28--  http://pecl.php.net/get/APC-3.0.19.tgz
           => `APC-3.0.19.tgz'
pecl.php.net をDNSに問いあわせています... 216.92.131.66
pecl.php.net|216.92.131.66|:80 に接続しています... 接続しました。
HTTP による接続要求を送信しました、応答を待っています... 200 OK
長さ: 115,735 (113K) [application/octet-stream]

100%[========================================>] 115,735       80.27K/s

14:15:30 (80.04 KB/s) - `APC-3.0.19.tgz' を保存しました [115735/115735]

/rootにダウンロードされた事を確認し解凍します。

[root@localhost root]# ls
APC-3.0.19.tgz   bkup.sh~*                           rootkit.sh*
Desktop/         domain.sh~*                         rootkit.sh~*
Maildir/         ftp.sh*                             rpm/
OCN/             install.log                         upgrade-log
Xrootenv.0       install.log.syslog                  user.txt*
anaconda-ks.cfg  mod_layout-50-vine-by_orbit.tar.gz  webalizer.sh*
backup.sh*       mysql.sql*                          webalizer.sh~*
backup.sh~*      mysql_bkup.sh*
bkup.sh*         postfix-2.2.10-10vl4.src.rpm
[root@localhost root]# tar xzvf  APC-3.0.19.tgz
package.xml
APC-3.0.19/tests/apc_001.phpt
APC-3.0.19/tests/apc_002.phpt
APC-3.0.19/tests/apc_003.phpt
APC-3.0.19/tests/skipif.inc
APC-3.0.19/arch/i386/atomic.h
APC-3.0.19/arch/x86_64/atomic.h
APC-3.0.19/arch/atomic.h
APC-3.0.19/CHANGELOG
APC-3.0.19/INSTALL
APC-3.0.19/LICENSE
APC-3.0.19/NOTICE
APC-3.0.19/TODO
APC-3.0.19/TECHNOTES.txt
APC-3.0.19/apc.c
APC-3.0.19/apc.dsp
APC-3.0.19/apc.h
APC-3.0.19/apc_cache.c
APC-3.0.19/apc_cache.h
APC-3.0.19/apc_compile.c
APC-3.0.19/apc_compile.h
APC-3.0.19/apc_debug.c
APC-3.0.19/apc_debug.h
APC-3.0.19/apc_fcntl.c
APC-3.0.19/apc_fcntl.h
APC-3.0.19/apc_futex.c
APC-3.0.19/apc_futex.h
APC-3.0.19/apc_globals.h
APC-3.0.19/apc_lock.h
APC-3.0.19/apc_main.c
APC-3.0.19/apc_main.h
APC-3.0.19/apc_mmap.c
APC-3.0.19/apc_php.h
APC-3.0.19/apc_pthreadmutex.c
APC-3.0.19/apc_pthreadmutex.h
APC-3.0.19/apc_sem.c
APC-3.0.19/apc_sem.h
APC-3.0.19/apc_shm.c
APC-3.0.19/apc_shm.h
APC-3.0.19/apc_sma.c
APC-3.0.19/apc_sma.h
APC-3.0.19/apc_pool.c
APC-3.0.19/apc_pool.h
APC-3.0.19/apc_spin.c
APC-3.0.19/apc_spin.h
APC-3.0.19/apc_stack.c
APC-3.0.19/apc_stack.h
APC-3.0.19/apc_zend.c
APC-3.0.19/apc_zend.h
APC-3.0.19/apc_signal.c
APC-3.0.19/apc_signal.h
APC-3.0.19/config.m4
APC-3.0.19/php_apc.c
APC-3.0.19/php_apc.h
APC-3.0.19/pgsql_s_lock.c
APC-3.0.19/pgsql_s_lock.h
APC-3.0.19/apc_fcntl_win32.c
APC-3.0.19/apc_rfc1867.c
APC-3.0.19/apc.php

解凍したAPCのディレクトリに移動し
コマンドphpizeを実行し
コンパイルしてインストールします。

[root@localhost root]# cd APC-3.0.19
[root@localhost APC-3.0.19]# phpize
Configuring for:
PHP Api Version:         20041225
Zend Module Api No:      20060613
Zend Extension Api No:   220060519
[root@localhost APC-3.0.19]# ./configure --enable-apc
checking for egrep... grep -E
checking for a sed that does not truncate output... /bin/sed
checking for gcc... gcc
checking for C compiler default output file name... a.out
checking whether the C compiler works... yes
checking whether we are cross compiling... no
checking for suffix of executables...
checking for suffix of object files... o
checking whether we are using the GNU C compiler... yes
checking whether gcc accepts -g... yes
checking for gcc option to accept ANSI C... none needed
checking how to run the C preprocessor... gcc -E
checking for icc... no
checking whether gcc and cc understand -c and -o together... yes
checking for system library directory... lib
checking if compiler supports -R... no
checking if compiler supports -Wl,-rpath,... yes
checking build system type... i686-pc-linux-gnu
checking host system type... i686-pc-linux-gnu
checking target system type... i686-pc-linux-gnu
checking for PHP prefix... /usr
(長いので省略)
(pthread_mutexattr_setpshared), your system may not support shared mutex's.
configure: WARNING: It doesn't appear that pthread mutex's are supported on your system
checking Checking whether we should use spin locks... no
checking for sigaction... yes
checking for union semun... no
checking whether we should enable valgrind support... no
checking for shm_open in -lrt... yes
checking for ld used by gcc... /usr/bin/ld
checking if the linker (/usr/bin/ld) is GNU ld... yes
checking for /usr/bin/ld option to reload object files... -r
checking for BSD-compatible nm... /usr/bin/nm -B
checking whether ln -s works... yes
checking how to recognise dependent libraries... pass_all
checking dlfcn.h usability... yes
checking dlfcn.h presence... yes
checking for dlfcn.h... yes
checking for g77... no
checking for f77... no
checking for xlf... no
checking for frt... no
checking for pgf77... no
checking for fort77... no
checking for fl32... no
checking for af77... no
checking for f90... no
checking for xlf90... no
checking for pgf90... no
checking for epcf90... no
checking for f95... no
checking for fort... no
checking for xlf95... no
checking for ifc... no
checking for efc... no
checking for pgf95... no
checking for lf95... no
checking for gfortran... no
checking whether we are using the GNU Fortran 77 compiler... no
checking whether  accepts -g... no
checking the maximum length of command line arguments... 32768
checking command to parse /usr/bin/nm -B output from gcc object... ok
checking for objdir... .libs
checking for ar... ar
checking for ranlib... ranlib
checking for strip... strip
checking if gcc supports -fno-rtti -fno-exceptions... no
checking for gcc option to produce PIC... -fPIC
checking if gcc PIC flag -fPIC works... yes
checking if gcc static flag -static works... yes
checking if gcc supports -c -o file.o... yes
checking whether the gcc linker (/usr/bin/ld) supports shared libraries... yes
checking whether -lc should be explicitly linked in... no
checking dynamic linker characteristics... GNU/Linux ld.so
checking how to hardcode library paths into programs... immediate
checking whether stripping libraries is possible... yes
checking if libtool supports shared libraries... yes
checking whether to build shared libraries... yes
checking whether to build static libraries... no
configure: creating libtool
appending configuration tag "CXX" to libtool
appending configuration tag "F77" to libtool
configure: creating ./config.status
config.status: creating config.h
[root@localhost APC-3.0.19]# make
(長いので省略)
cp ./.libs/apc.so /root/APC-3.0.19/modules/apc.so
cp ./.libs/apc.lai /root/APC-3.0.19/modules/apc.la
PATH="$PATH:/sbin" ldconfig -n /root/APC-3.0.19/modules
----------------------------------------------------------------------
Libraries have been installed in:
   /root/APC-3.0.19/modules

If you ever happen to want to link against installed libraries
in a given directory, LIBDIR, you must either use libtool, and
specify the full pathname of the library, or use the `-LLIBDIR'
flag during linking and do at least one of the following:
   - add LIBDIR to the `LD_LIBRARY_PATH' environment variable
     during execution
   - add LIBDIR to the `LD_RUN_PATH' environment variable
     during linking
   - use the `-Wl,--rpath -Wl,LIBDIR' linker flag
   - have your system administrator add LIBDIR to `/etc/ld.so.conf'

See any operating system documentation about shared libraries for
more information, such as the ld(1) and ld.so(8) manual pages.
----------------------------------------------------------------------

Build complete.
Don't forget to run 'make test'.

[root@localhost APC-3.0.19]# make install
Installing shared extensions:     /usr/lib/php5/

/usr/lib/php5/内にapc.soが作成されている事を確認。

[root@localhost APC-3.0.19]#  ls /usr/lib/php5/
apc.so*  build/      mysql.so*   pdo.so*        pdo_sqlite.so*
bin/     mcrypt.so*  mysqli.so*  pdo_mysql.so*

/rootへ戻りphp.iniを編集します。

[root@localhost root]# vi /etc/php5/php.ini
下記を最下部に追記
extension=apc.so

Apache2を再起動

[root@localhost root]# /etc/rc.d/init.d/apache2 restart
httpdを停止中:                                             [  OK  ]
httpdを起動中:                                             [  OK  ]
[root@localhost root]#

これでPHPで書かれたプログラム(WordPress等)を高速処理できます。

Vine Linux Apache2 アクセスログ ファイル

#vi /var/log/apache2/access_log
ここにLOGファイルを保管しているみたいです。

VineLinuxで自宅サーバー様と
Homeserver on Vine Linux – Vine Linuxで自宅サーバーを作ろう
を参考にさせてもらいWebalizerをインストールしてみました。

元はApache用で設定ファイルが記述されていましたので
Apache2用に変更させていただきました。

WS000020

付けてみて早速の感想ですが、凄く鯖のアクセス状態が分かりやすくなりますね^^

今回アクセス数の多い当サーバー利用者にも同じように
Webalizerを設置させていただきました。

何となくDosでも食らってるかな・・・・・・・
なんて思うことが多々ありまして・・・・・・・^^;
モジュールを追加して厳しく対処していこうかで迷ったのですが
まずは、このLogを観察しならら考えます^^

[追記]
以前から知ってはいたのですが・・・・
不振にも突然外部から繫がりにくくなる事がたびたび発生するみたいです。
BLOGのアクセス解析に載っていないのに異常にアクセスが多いIPを表示しておきます。
別にBLOGを見に来た分けでも無く自分よりアクセス数が多いってどういう事でしょうかね^^;

踏み台なのでしょうかね・・・・・・

60.48.206.84

inetnum: 60.48.0.0 – 60.54.255.255
netname: XDSLSTREAMYX
descr: Telekom Malaysia Berhad
descr: Network Strategy
descr: Wisma Telekom
descr: Jalan Pantai Baru
descr: 50672 Kuala Lumpur
country: MY   → (マレーシア)
admin-c: TIA7-AP
tech-c: TIA7-AP
status: ALLOCATED PORTABLE
mnt-by: APNIC-HM
mnt-lower: MAINT-AP-STREAMYX
mnt-routes: MAINT-AP-STREAMYX
remarks: -+-+-+-+-+-+-+-+-+-+-+-++-+-+-+-+-+-+-+-+-+-+-+-+-+-+
remarks: This object can only be updated by APNIC hostmasters.
remarks: To update this object, please contact APNIC
remarks: hostmasters and include your organisation’s account
remarks: name in the subject line.
remarks: -+-+-+-+-+-+-+-+-+-+-+-++-+-+-+-+-+-+-+-+-+-+-+-+-+-+
changed: hm-changed@apnic.net 20040607
changed: hm-changed@apnic.net 20070209
source: APNIC

role: TMNST IP Administrator
address: TELEKOM MALAYSIA BERHAD
address: Level 17 TM Annexe 1,
address: JALAN PANTAI BARU
address: 50672 KUALA LUMPUR
country: MY   → (マレーシア)
phone: +6-1-800-88-2646
fax-no: +603 22402126
e-mail: ssc@tmnet.com.my
trouble: abuse@tm.net.my
trouble: tmcops@tmnet.com.my
trouble: dnsadm@tmnet.com.my
trouble: ipno@tm.net.my
admin-c: AS115-AP
tech-c: EA35-AP
nic-hdl: TIA7-AP
notify: ainols@tm.com.my
changed: hm-changed@apnic.net 20070209
mnt-by: MAINT-AP-STREAMYX
source: APNIC

60.211.17.170
inetnum: 60.208.0.0 – 60.217.255.255
netname: UNICOM-SD
descr: China Unicom Shandong province network
descr: China Unicom
country: CN   → (中国)
admin-c: CH1302-AP
tech-c: XZ14-AP
mnt-by: APNIC-HM
mnt-lower: MAINT-CNCGROUP-SD
mnt-routes: MAINT-CNCGROUP-RR
status: ALLOCATED PORTABLE
remarks: -+-+-+-+-+-+-+-+-+-+-+-++-+-+-+-+-+-+-+-+-+-+-+-+-+-+
remarks: This object can only be updated by APNIC hostmasters.
remarks: To update this object, please contact APNIC
remarks: hostmasters and include your organisation’s account
remarks: name in the subject line.
remarks: -+-+-+-+-+-+-+-+-+-+-+-++-+-+-+-+-+-+-+-+-+-+-+-+-+-+
changed: hm-changed@apnic.net 20040705
changed: hm-changed@apnic.net 20060125
changed: hm-changed@apnic.net 20090508
source: APNIC

route: 60.208.0.0/13
descr: CNC Group CHINA169 Shandong Province Network
country: CN   → (中国)
origin: AS4837
mnt-by: MAINT-CNCGROUP-RR
changed: abuse@cnc-noc.net 20060118
source: APNIC

person: ChinaUnicom Hostmaster
nic-hdl: CH1302-AP
e-mail: abuse@chinaunicom.cn
address: No.21,Jin-Rong Street
address: Beijing,100140
address: P.R.China
phone: +86-10-66259940
fax-no: +86-10-66259764
country: CN   → (中国)
changed: abuse@chinaunicom.cn 20090408
mnt-by: MAINT-CNCGROUP
source: APNIC

person: XIAOFENG ZHANG
nic-hdl: XZ14-AP
e-mail: ip@pub.sd.cninfo.net
address: Jinan,Shandong P.R China
phone: +86-531-6666666
fax-no: +86-531-6666666
country: CN   → (中国)
changed: ip@sdinfo.net 20050330
mnt-by: MAINT-ZXF
source: APNIC

118.100.186.120

inetnum: 118.100.0.0 – 118.101.255.255
netname: ADSLSTREAMYX
descr: TELEKOM MALAYSIA BERHAD
country: MY   → (マレーシア)
admin-c: TIA7-AP
tech-c: TIA7-AP
status: ALLOCATED PORTABLE
remarks: -+-+-+-+-+-+-+-+-+-+-+-++-+-+-+-+-+-+-+-+-+-+-+-+-+-+
remarks: This object can only be updated by APNIC hostmasters.
remarks: To update this object, please contact APNIC
remarks: hostmasters and include your organisation’s account
remarks: name in the subject line.
remarks: -+-+-+-+-+-+-+-+-+-+-+-++-+-+-+-+-+-+-+-+-+-+-+-+-+-+
changed: hm-changed@apnic.net 20070830
mnt-by: APNIC-HM
mnt-lower: MAINT-AP-STREAMYX
source: APNIC

role: TMNST IP Administrator
address: TELEKOM MALAYSIA BERHAD
address: Level 17 TM Annexe 1,
address: JALAN PANTAI BARU
address: 50672 KUALA LUMPUR
country: MY   → (マレーシア)
phone: +6-1-800-88-2646
fax-no: +603 22402126
e-mail: ssc@tmnet.com.my
trouble: abuse@tm.net.my
trouble: tmcops@tmnet.com.my
trouble: dnsadm@tmnet.com.my
trouble: ipno@tm.net.my
admin-c: AS115-AP
tech-c: EA35-AP
nic-hdl: TIA7-AP
notify: ainols@tm.com.my
changed: hm-changed@apnic.net 20070209
mnt-by: MAINT-AP-STREAMYX
source: APNIC

BackTrack 3 Apache起動 方法

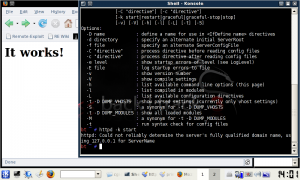
どうも調べたらBackTrack 3 にはApacheが入ってる見たいなので
起動させてみました。

# httpd -k start
で起動させる事が可能です。
Apacheなので設定ファイルは
/etc/httpd/httpd.confかと思います。

公開ディレクトリは
/var/www/htdocs
です。
CGIは
/var/cgi-bin
に入れてください。

CGIは実行前に
# chmod 777 /var/www/cgi-bin
で実行権を投与しておきます。

なぜか元から入ってるCGI(printenv.cgi等)のパスが
#!/usr/local/bin/perl
でこのままでは起動しなかったので
#!/usr/bin/perl
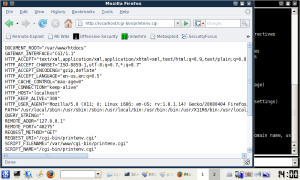
と修正してブラウザから
http://localhost/cgi-bin/printenv.cgi
と入力しましょう。

snapshot3

snapshot2

日本語環境でないと日本語が文字化けしますので日本語環境にしておきましょう。

USBメモリーから仮想PCでLinuxを起動したい!

一応持ち運びできるUNIX環境が欲しくて準備しました^^

Virtual PCやVMware Serverはインストールする必要がありますし・・・・
USB BOOTでは気に入らないことがありまして
悪魔でWindowsを起動した中でVineLinuxを起動したい!!
と言うことです。

でもテストで使ったUSBの調子が悪いのか以前からランチャーを起動
しようとしたら強制的に切断されたりと色々と問題がありまして、
大丈夫かなーと入れてみましたが
やっぱり実際に起動させたら突然接続が途絶えてしまいました^^;

たぶん他のUSBメモリーなら旨く動くかもしれません。
気になる方や必要な方はUPLOADERのアプリケーション、Windows系に
VineLinux 4.2 on QEMU for windows.zip
と言う名前でUPしていますのでご自由にお使いください^^

容量が結構いりますので4Gb以上のUSBメモリーが必要です。
GUIで起動させますので256Mbのメモリーを使用します。
Windows XP環境でstart.batをクリックすると起動するかと思います。

使用したソフトはQEMUと言うインストール不要のエミュレータです。
VineLinux4.2(Serverパッケージ)のイメージを同封しています。

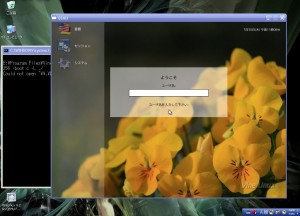
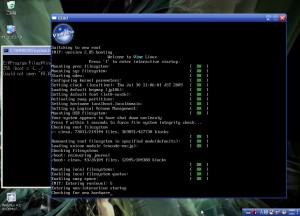
動作画像
WS000006

WS000007

参考元:Vine Mac

新しく参考書購入しました^^b

サーバー構築やPerlを色々学んで思った事は
通信関係も知らなければいけないと・・・・言うわけで^^;

ちょこちょこ本をあさる分けには行かないので
思い切ってこの本を買ってしまいましたw
Image092

Perlを覚える為に何回も読み返した本と比べると厚さは3倍くらいでしょうか・・・・
学校で使う英和辞書の2倍の大きさがあります(汗
Image094
ぼちぼち頭に叩き込んで行きましょうかw

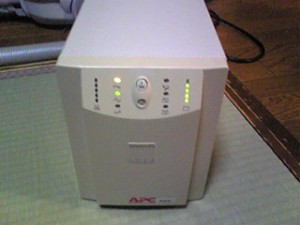
Smart-UPS 1000 無停電電源装置 バッテリー交換

無停電電源装置用に買ったバッテリーが届いたので設置してみました^^

バッテリーは純正ではなく
船舶等に使われるLONG製 WP12-12(12V 12AH)
シールドバッテリーを使用しました。
サイズ:横幅151mm×奥行98mm×高さ93mm

ちなみに純正品はと言いますと
B.B. Battery社のBP12-12というバッテリーだそうです。
参考元:APC Smart-UPSバッテリ調査
電圧と容量は同じです。
サイズは・・・・・・・・
5.94″ L x 3.86″ W x 3.70″ H (151mm x 98mm x 94mm)
参考元(海外):BATT SEALED LEAD ACID 12V 12AH – BP12-12-T2-FR
との事でほとんど同じです。
実感した事は海外はインチを使うんですね・・・・・・
海外のサイトを飛び回って調べました^^;

さて結論からですが、無事問題無く動きました。
純正バッテリーがセット(BP12-12が二個)で約三万円程します。
今回購入したLONG製 WP12-12(12V 12AH)は
秋月商店では(WP12-12が一個)三千七百円程でした。
セットで7400円とは激安です。

ですが自己責任である事と処分にお金がかかることをお忘れなくorz

取り付け手順は仕様書を読めば分かると思いますが

前のカバーを開け(フレキを傷つけないよう慎重に)
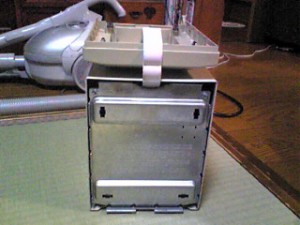
中の大きなネジ2個を外し金属の蓋を開けます。

ここからは感電しないよう注意をしてください。

マイナス→プラスの順にリード線を外しバッテリーを中から引きずりだします。

ヒューズを引き抜きましょう

新しいバッテリーを準備します。
Image085

直列になるように並べてヒューズを取り付けます。
Image086

先ほどの取り外しの時とは逆に
プラス→マイナスの順にリード線を接続してUPSの中に収めます。
Image087

Image088

金属の蓋を閉めネジで止めましょう。
Image089

カバーを閉め、コンセントを繋ぎ電源を入れてみましょう。
Image090

起動させて異常が無ければバッテリーの交換完了です。

これで夜ゆっくり寝られる~\(^O^)/

CGI製 掲示板 β Ver2.4

この頃Perlネタが続いてますね・・・・・
1年も経つとサーバー管理もだいぶ安定して書く事も減ってきまして^^;

そういえばこのBlogももう少しで1周年ですね~
ORBIT SPACE(BLOG)創設日
2008年 8月 15日
なんか始めた当初は”3ヶ月で無くなるさw”なんて言われてましたが
ふと振り返ると1年とはずいぶん短いものですね^^
なにか1一周年を記念した特大ネタでも準備しないといけないのかな・・・・w

話は変わりましてサーバーといえばなんですが
毎度の事ですが相変わらずSSHへのアタックが酷いです
LOGから 2009/7/4
sshd:
Authentication Failures:
unknown (222.114.39.251): 1664 Time(s)
root (222.114.39.251): 314 Time(s)
mysql (222.114.39.251): 11 Time(s)
games (222.114.39.251): 5 Time(s)
gdm (222.114.39.251): 5 Time(s)
gopher (222.114.39.251): 5 Time(s)
news (222.114.39.251): 5 Time(s)
nobody (222.114.39.251): 5 Time(s)
postfix (222.114.39.251): 5 Time(s)
avahi (222.114.39.251): 4 Time(s)
ftp (222.114.39.251): 4 Time(s)
mail (222.114.39.251): 4 Time(s)
named (222.114.39.251): 4 Time(s)
root (61.139.33.207): 2 Time(s)
bin (222.114.39.251): 1 Time(s)
root (60.191.231.82): 1 Time(s)
uucp (222.114.39.251): 1 Time(s)
Invalid Users:
Unknown Account: 1664 Time(s)

ある特定のユーザー以外のrootやその他のユーザーでは先ずログインできませんし、
その特定のユーザーしかsudoも使えませんから問題は無いのですが
あまり気分はよくないものですね(苦笑

しかし、ボットからのアタックを避ける為に22番以外をポートを指定すると
色々と自分が困ってしまいます。
どうしようかな・・・・・・

あと
先日無停電電源装置を購入しました^^
現在バッテリーを準備中です。
夏場はサーバーの放熱対策もですが
クーラーなどによるブレーカーが落ちる事が怖いですからね~^^;

掲示板作成についてですが、
ほぼ完成と言っていいのでは?と言うレベルまで達してます。

自動インストール機能は付いてませんが
CGIを使った事が無い方でも簡単に設置できるように作ってます。
Ver1.0の頃よりはソースも読みやすいようになるように
って考えてますしどの環境でも動くように努力しています。

公開できないのが残念ですが(苦笑

掲示板ソースのイメージ
Image084
下の黒いのはこのBLOGを公開している1Uサーバーです^^